One of the features I was excited to try in the new release of Photoshop was the upgraded High Dynamic Range (HDR) functionality. In the past, HDR required additional plugin products or a lot of labor intensive work.
After doing a photo assignment today, I had the opportunity to photograph a couple of South Dakota landscapes with some dramatic clouds in the sky. I shot three rapid fire photos with a bracketing setting on my Nikon D300 as I often do these days to open up options in post production.
When I arrived at home, I was thinking I wish I had CS5 already as it would make some of my editing go easier (referring to other features – perhaps a future blog post.) I decided I’d download the trial software as I will probably be upgrading in the next month. Of course, the FIRST thing I needed to try was the HDR!
I started in Lightroom and identified the set of photos I wanted to work with. Here is the landscape in the photo exposed at the level I decided was “correct”.
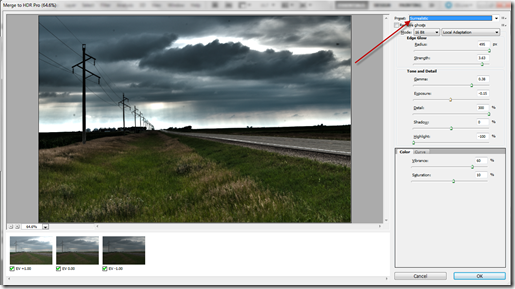
Right from Lightroom, I selected “merge to HDR in Photoshop”.
There are many presets and much more control in the new release. I selected a preset for “surreal” and then played with sliders to more closely match what I saw with my own eyes a few hours ago.
And along with a frame from onOne Photoframes, here is the finished product!
Find me on Facebook!


